Showing posts with label DIY. Show all posts

Saturday, 14 March 2015

My New Breakfast Obsession: Oat

When I was growing up, Oat was a breakfast option I never liked. In fact, I despised it, but my mother made us take it. About a few years ago, I became more conscious of what I ate and oats became an option I started to consider. Now I am not saying that I "fell in like" with it, far from it, I still dreaded mornings I planned it as a breakfast option. I just took it because it was healthy for me, high in fiber and I could take it with left over fruits. To be honest, I end up trashing it because it goes stale in my pantry.

However, the story has changed now. I discovered oat flour and my mornings with an oat breakfast is something I look forward to now.

What is Oat Flour?
Oats can be further processed into coarse powder. It becomes Oat Flour.


How I Make Oats Flour
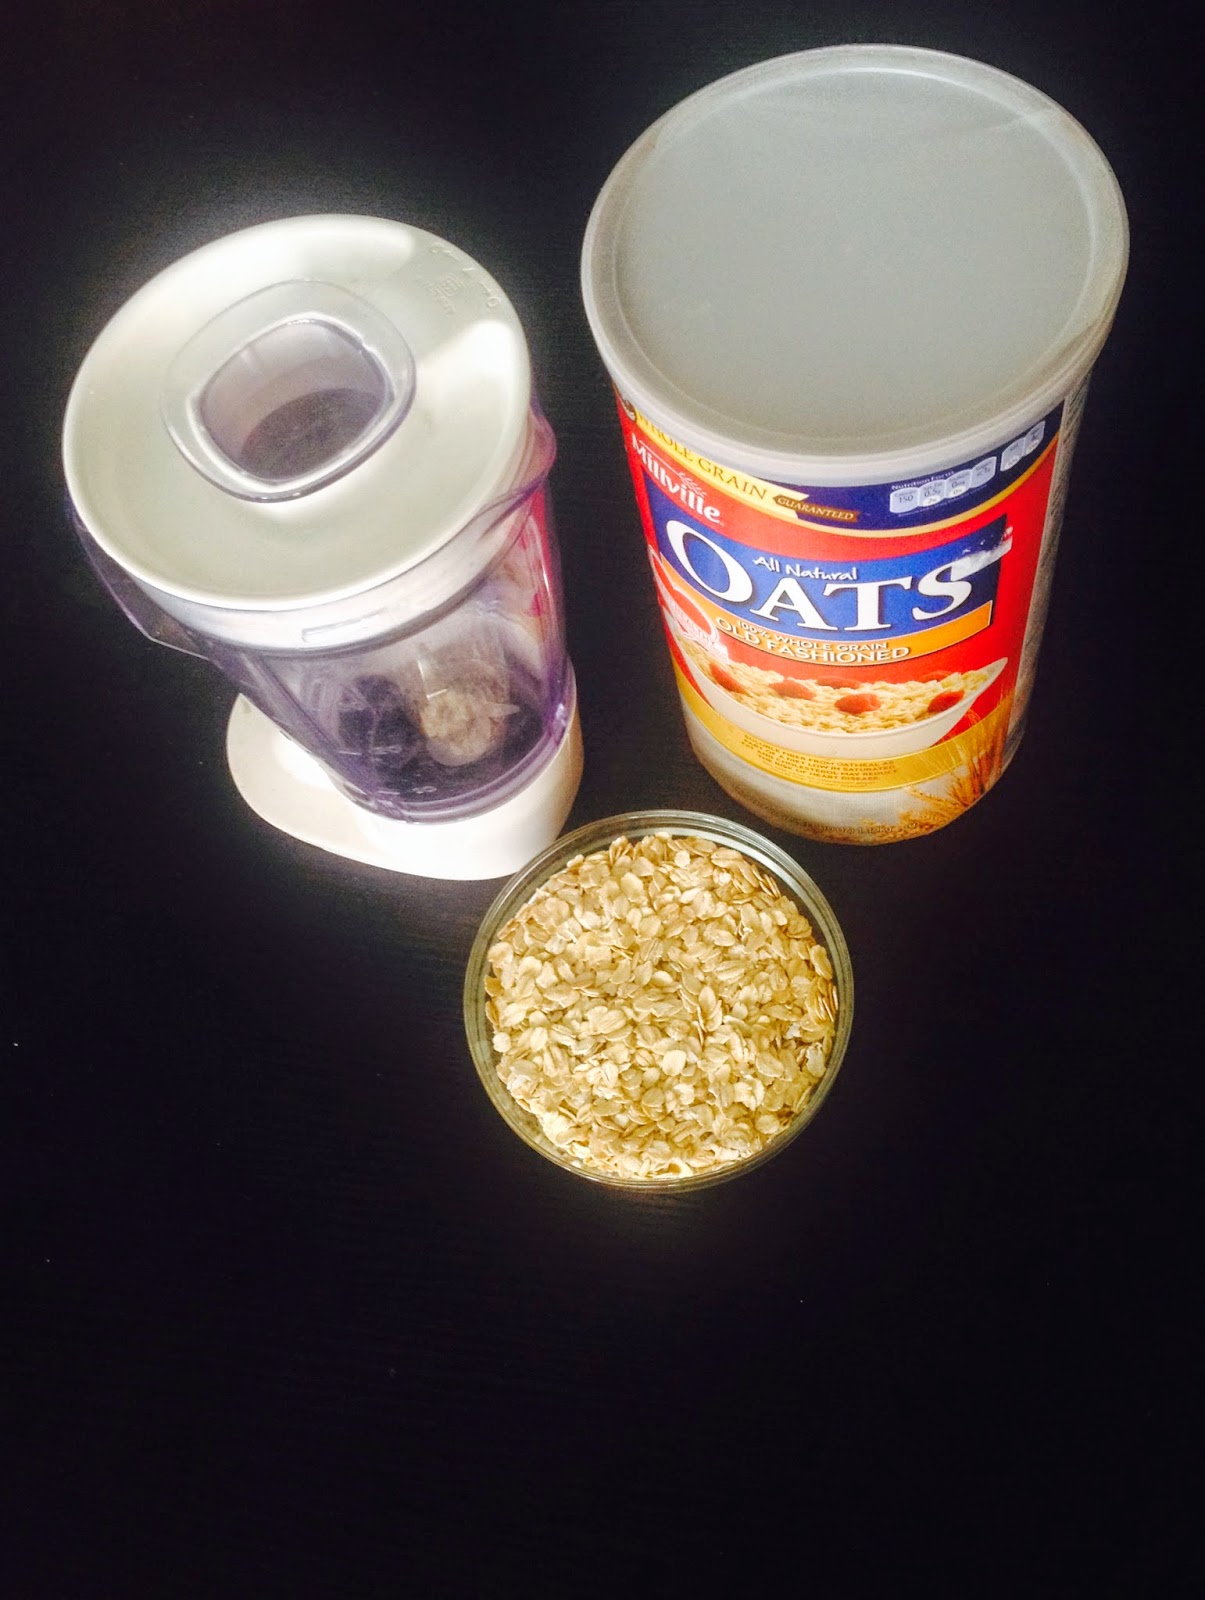


Ingredients
- Whole grain Oat (preferably organic ones, but any one will still do the job)

Time: Less than 3 Minutes

Equipment Needed
- Blender (dry food blender) or Food processor (I prefer a blender because it was faster than my food processor)

Instruction
- Put as much oats as you need into the blender. I will advise that the oats are higher than the blender's blades. This enables the blender to blend the content better.
- Blend the oats until it becomes fine.
- Store in an air tight dry food container until ready for use.

Result
- Close to a flour consistency, just a bit coarser


Tips: Most Blenders can get the job done. I use my wet food blender too. If using a wet food blender, You might need a spatula to stir the content every now and then when it's blending. Blend for like 20 seconds first, then stir the oats, blend for 10 seconds again and keep repeating until you get your desired result.


My oat flour is used in everything from breakfast meal to pancakes. Recipes of how I use it is coming soon in other posts. 

Saturday, 19 October 2013

DIY Unripe Plantain Swallow (Plantain Amala) - From scratch under 20 mins


Unripe Plantain Swallow is also known as Plantain Amala or Plantain Fufu. I am accustomed to the old method of buying dried unripe plantains from my local market, grinding them to fine powder and cooking/turning it into a solid paste that looks like this picture below. The drying process of unripe plantains makes it look like (colour wise) the picture below.

Source: Wikipedia

Unripe plantain swallow is my favourite Nigeria swallow but to be frank it has one of the most unattractive food colour ever. 

However, with this method, colour is no longer a turn off. I am very new to this method of making unripe plantain swallow. My dad and mum told me to try it out (They weren't sure it will turn out great) and I gave it a go. 

Tools needed:
- Blender
- Turning Stick
- Knife
- Pot
- Packer/Large Serving Spoon
- 1/4 cup of boiled water


Turner. Packer, Knife and Blender

Ingredients:
- 3 unripe medium size plantains
- 3/4 cup of water


Serves: 2 (two) medium-hungry people
Total Time: 20 mins for fast cooks / 35 mins for beginners

How To Prepare

- Peel plantain bark off


My mum doing the work of peeling the bark off and chopping
- Chop peeled plantain into smaller pieces for easier blending


I put the chopped plantain in water while peeling the rest to allow it retain it's moisture and prevent it from getting discoloured

- Add the 2/3 cup of water and blend the plantain until it becomes a smooth puree


- Pour the plantain  puree into a pot and set on medium heat/fire to boil
Puree-like texture
- When the plantain puree begins to boil, take you turning stick and begin to turn carefully
Note: Take necessary breaks if needed when turning. Puree might appear lumpy when turning but don't worry about it. Continuous turning and mashing will eliminate the lumps eventually.


The lumps I mentioned that will eventually smoothen

- Turn until you achieve the smooth swallow/solid-like texture you desire


Turn till I get a solid paste
- Add 1/4 cup of boiled hot water and cover to steam for about 2-3 minutes
- Turn again 
- Food is ready to be served with soup of choice. 


Unripe Plantain Swallow with Fresh Vegetable Soup 


I prefer this method because
- It is a DIY that doesn't require a lot of processing/time to get your unripe plantain to your end result
- It tastes fresh and good
- It has a nice colour
- It doesn't pass through many unknown handlers, hands and markets

I haven't tried it with ripe plantain yet. This is because I think the sugar content will be high and the starch content will be lower, so it might not hold well but I might be wrong Although anyone can try it and tell me how it turned out.

Friday, 9 August 2013

Homemade Black Tea Hair Spray


After big chopping (BC) my hair, the first couple of months that followed, I experienced little to no shedding/breakage. In fact, not intending to exaggerate, I comb and manipulate my hair a lot and still have no hair loss at all. I never understood why many naturals complained of shedding and breakage. I automatically assumed that I was blessed with hair genes that didn't allow for shedding and breakage. 

Fast forward six month later, I am on the Internet surfing for ways to reduce hair shedding. It is not problematically bad but it is enough to get one of my eye raised up. In the first three months of my natural hair journey, I always incorporated green or black tea into my wash day hair regime, although then I didn't really know its uses. I just did it because the naturals of the blogs I read did it. I stopped doing it because I wanted to try other things and later reduce the must-dos on my wash day regime. 

When I read the amazing benefits of black and green tea here, I decided to use the black tea spray to reduce my shedding rate without increasing my time spent on wash days. I prefer black tea because I like the stain it will leave on my hair. I am a sucker of jet or dark black hair.

What I Use
- A spray bottle
- A bag of black tea
- 50 ml boiled water
- Essential oil of your choice (I use about four drops of rosemary essential oil)


I brew my black tea in 50 ml of water for about 10 minutes. I prefer it concentrated since I am not spraying my hair wet or damp. I can use this mixture for about four to five days but I use it for only three days. I use essential oils to preserve it and still put it in the fridge everyday (just to make sure bacteria doesn't take it cause). There are various ways in which I spray my black tea mix. 

Method 1 - On the first day of making it, I put the very warm tea in my spray bottle and add about four drops of my rosemary essential oil. I spray this warm mixture on my dry 2nd, 3rd, 4th or 5th day wash and go hair depending on the day I make it. Note that: I don't use this on my wash or co-wash day. I mist my hair every other day to fluff n go and/or to give it moisture before I seal with my oil, cream or butter of my choice.

Method 2 - On the second day of using the already cool mixture. I first use a cream or moisturizer of choice before I take a shower and allow the steam to open my hair cuticle. Then I spray my cold black tea to close it up. 

Method 3 - For all the black or green tea drinkers out there. Ignore all I have said above. Whenever you make yourself a great cup of tea, take three teaspoons or more and put in your spray bottle. Spray your hair with it and seal with oil or cream of choice. This is by far the easiest method if you are into drinking tea every now and then.

What I Noticed After A Month
- My shedding has significantly reduced. I am not declaring that it has stopped by a 100% but it has reduced enough for me to get a good night's rest, knowing I am doing everything right to reduce shedding.

- My hair feels stronger. Maybe strengthen is the right word. I am not really sure why it feels that way but it does. Just make sure you seal or use a moisture every time or every other time you use the spray.

- It also feels just a bit softer. This might be as a result of the stiffness I heard black tea makes the hair, so I always endeavor to properly seal it with moisturizing creams or oils. 

- I get to moisturize my hair with water instead a leave-in or mist spray.

- It can act as a refresher on those odd days that the hair needs it.

How Often Should it be Applied
I am a freelance hair person and do whatever I so please but considering the fact that I have read that an overdose of caffeine on the hair can cause stunted growth, I will recommend about three to four times a week.

Am I the only wacko one or has anyone else given this tea hair spray thing a try?


Monday, 13 May 2013

My Cough/Catarrh Remedy

Dealing with cough and catarrh can be very annoying, especially when the weather is sunny and hot, like what I am experiencing now. The last thing you want to be drinking at times like these are hot drinks. However, cough/catarrh is usually the first sign for me to get back on track whenever I am slacking at eating a healthy diet.


At the first strike of cough/catarrh, I get out the following ingredients below;
  • 1 medium size ginger
  • 2 garlic cloves (optional)
  • 1 medium size lime or lemon
  • 1 tablespoon of organic/raw honey (I use raw 15+ manuka New Zealand honey)
  • 1 cup of water (250ml)


I always have these ingredients in my kitchen because I use them to cook every time. The use of garlic is optional because not everyone can stand the smell. In fact, I will not advise you to use it in this recipe if you have an important meeting or outing the following day because your breath might still stink of it. On a personal preference, I think garlic is the answer to so many illnesses and sickness. I think a bit of garlic every now and then keeps the doctor away but again, that is just me thinking.


Preparation (Easy)
I peel my ginger and garlic, chop them up and toss into a blender. I add a cup of water to it and blend it. I then put the blended mixture (water, ginger and garlic) in a pot and let to get warmed up. Now I don’t believe in letting my water get up to 100 degrees because I believe boiling of the blended mixture will reduce the properties of the ginger and garlic. I just allow it to get warm, not more than I can drink immediately (I usually should be able to put my finger in the water without screaming in pain). After the water is warm enough, I squeeze my lime or lemon and add my tablespoon of honey. Viola!!! Ready to drink.

Whenever I am plagued with cough/catarrh, I enjoy taking this at night just before I sleep and I wake up in the morning feeling relieved.

My rationale for the use of the above ingredients
Ginger is an herb that grows as a root. It is believed to help cure headaches, colds, fatigue, nausea, motion sickness, morning sickness, the flu, muscle soreness, menstrual pain, upper respiratory tract infections, and even diabetes. It can also act as a good pain and ache reliever. Ginger promotes energy circulation in the body while positively increasing the body's metabolic rate.

Garlic is another wonder herb, nicknamed 'stinking rose'. It has been used for years in the treatment of diseases and conditions. Garlic contains a chemical called allicin. This chemical makes garlic work for certain conditions. Allicin also makes garlic smell, not only does it cause bad breath, but it actually travels through your entire body and can come out of your pores. Garlic that loss this chemical is less effective. Garlic is a natural powerful antibiotic, antiviral and anti-fungal herb. There is strong evidence of garlic treating high blood pressure, hardening of the arteries (atherosclerosis), colon cancer, rectal cancer, and stomach cancer, tick bites and fungal infections. Although, there are not sufficient evidence on the relationship between garlic and the treatment of cold/cough/catarrh but preliminary research suggests garlic might reduce the frequency and number of colds when taken for prevention.

Lime/lemon contains vitamin C and a flavonoid called limonin glucoside. Limes are very good antibiotics, detoxifiers and great antioxidants. Limes cleanses bacteria and toxins from the body and aids in digestion. These properties in these citrus help halt the progress of cold/cough/catarrh.


Any raw and organic honey is great for the treatment of cold but Manuka honey is a different one of a kind. Manuka honey is produced in New Zealand by bees that pollinate the native Manuka bush. The major antibacterial component in Manuka honey is methylglyoxal (MG). MG is a compound found in most types of honey, but usually only in small quantities. Unique Manuka Factor (UMF) is a concentration of unique antioxidant phenols present in this type of honey that directly inhibits bacterial growth and promotes healing. Its antibiotic, anti-fungal, and antiviral properties makes it an effective remedy for sore throats, colds, acne, sinusitis, acid reflux and heartburn, ringworm, wounds, burns, and other skin problems.


Sources
The Healing Power of Garlic by Paul Bergner
Website: http://www.naturalnews.com
Website: http://www.webmd.com


Saturday, 3 November 2012

An Attempt to Detox

During the week, I went out on Wednesday evening for a drink with a friend and my system can't handle just a bottle of beer. It got me thinking about how I have slightly diverted from my healthy eating lifestyle this past couple of weeks. I also had a hangover two weeks before and it took me about one week to get over it. I decided to get a cleanse this weekend.

I came across this nice cleanse recipe on the Chef Ahki Facebook page and felt inspired to use it too. So on Friday after work, I headed to Sainsburys to get the following;


  •  Kale - 200g (used 100g)
  • Spinach - 200g (used 100g)
  • Lime -  4 medium but used only 1
  • Cayenne pepper - used about half a tablespoon
  • Green tea - 2 bags (Had this at home already)
  • Water - 2 cups (Had this at home already)
  • A food blender (Had this at home already)


I am not a 'greens' freak and don't make too much effort towards ensuring I always have 'the greens'. I prefer fruits and vegetables with other bright colours. However, this weekend I am giving 'the greens' a go and see if I succeed at it.

I came up with my own twist by using cooled down green tea to blend all the above and below ingredients.  

Why I used the above ingredients for my detox

Kale for detoxing - Kale contains isothiocyanates (TIC) from glucosinolates and it enables the body to detoxify in both phase I and II. Also the high sulfur in Kale is known to be essential for Phase II of detoxification. Phase I and II detox­i­fi­ca­tion is the process by which toxic com­pounds (usu­ally stored in fat) are made water-soluble, and released by the body. Water-soluble com­pounds are able to be released as urine by the kid­neys, by sweat in the skin, or by the bile from the gall bladder. In summary, Phase I neu­tral­ise the tox­ins and Phase II prepares them for elimination. For more information click here

According to WebMD, a cup of kale contains 36 calories, 5 grams of fiber, and 15% of the daily requirement of calcium and vitamin B6 (pyridoxine), 40% of magnesium, 180% of vitamin A, 200% of vitamin C, and 1,020% of vitamin K. It is also a good source of minerals copper, potassium, iron, manganese, and phosphorus.

Spinach for detoxingA huge benefit of eating spinach for detoxification purposes is that it contains chlorophyll, which helps to absorb pesticides and heavy metals that are often found in several everyday fruits and vegetables. Generally, spinach contains similar nutrient to that of Kale with added Vitamin E.

For more about spinach vs kale click here

Lime for detoxing - This citrus fruit has come a long way with me. Also considered a berry, it is my go to fruit when i am feeling sick and nauseated. It contains vitamin C and a flavonoid called limonin glucoside. Limes are very good antibiotics, detoxifiers and great antioxidants. Limes cleanses bacteria and toxins from the body and aids in digestion, making them a key ingredient for liver detoxes


My Verdict: I know it is almost impossible to see the results of the cleanse immediately but i feel great about it. I must say though that it was not a kind of drink I could lounge at home, watch a movie and enjoy its taste. I had to rush it down and try not to savour it. Don't get me wrong, it wasn't bitter or disgusting in taste but I am not a fan of smoothie consistency and this drink happens to have just that. All in all, it is something I can get used to like salads, and go on to have it about three times or even more a week as time goes on.


Source:
http://www.healthdiaries.com/eatthis/9-health-benefits-of-kale.html
http://www.webmd.com
http://www.ehow.com